The Sierra Skies Observatory was built in late March 2010, and equipment was installed by late April 2010. Over the following 6 months, while using the observatory, we have made small additions and improvements. However, as of late 2010, we consider the observatory to be essentially completed. Note the wireless weather station at the upper left of this image (on the unpainted 2x4 ... OK, there are still a few more small projects to complete!). |  |
 | Here is another view of the Sierra Skies Observatory in its "completed" state. Well, looking at this photo, I'm reminded of another "small project" ... Our main power is currently coming through an extension cord (!) as the total operating power of the observatory is under 200W (i.e., less than 2A at 120VAC). However, I intend to run propr mains power (in suitable burried conduit) from our backyard breaker box, which is only about 40' (12 m) from the observatory. |
The observatory fits well into our backyard, and cannot even be seen from the house (which my wife appreciates). In this photo, you can see one of our upper decks (which is on the same level as the observatory deck), as well as a 'park bench' in the upper yard. We have a small stream to the left, and a pond to the right of the image. |  |
 | Here is a view of the completed interior of the observatory. You can see the scopes mounted on the Paramount ME (which is on the Software Bisque pier); our AstroLaptop corner; the remote power switch (just visible to the left of the pier); the observatory air conditioner to the right; and eyepiece cases and storage area to the left. The dome slit is open, and the dome is in the "park" position. |
Another view of the completed observatory, looking up at the Sirius 2.3 m dome, with the slit open. | 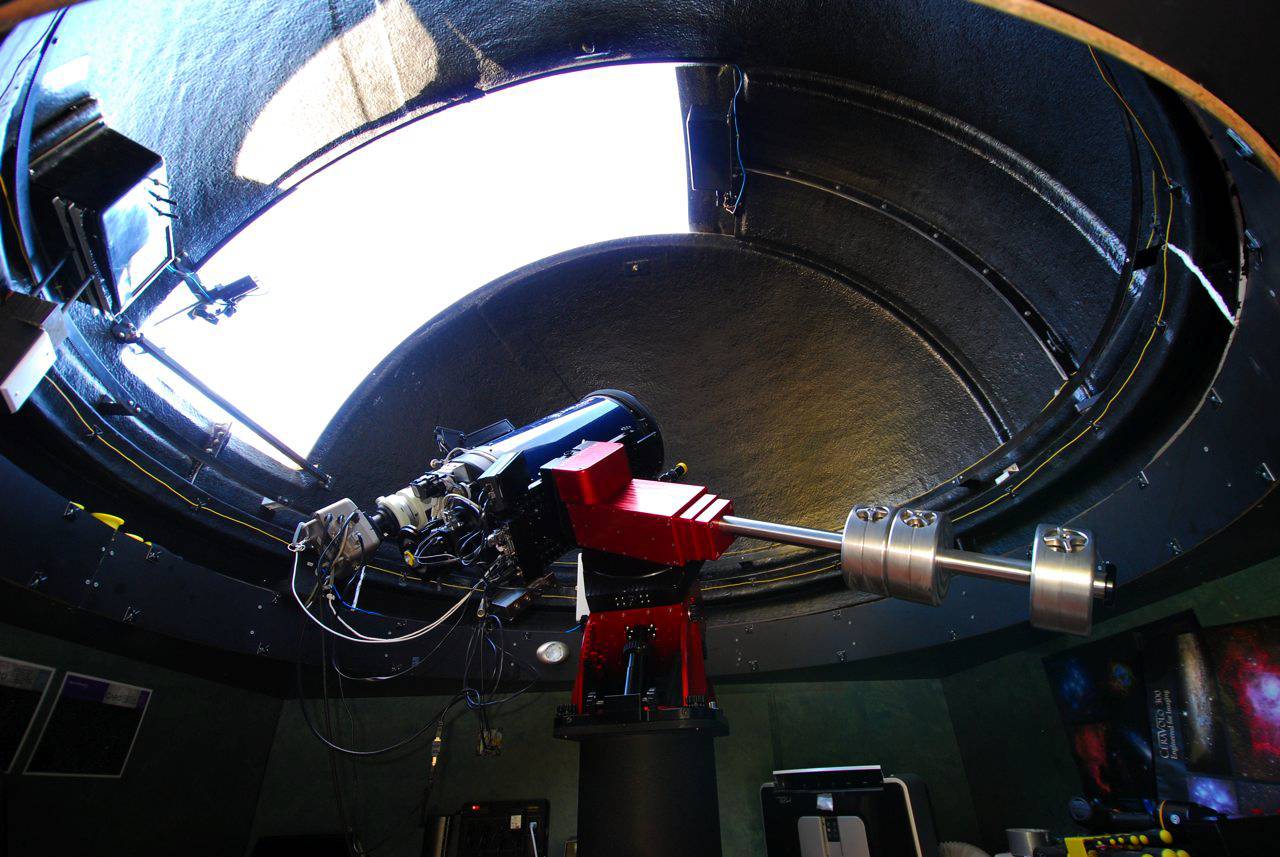 |
 | Here is the "electronics" corner - with the Dell Astro Laptop at left; UPS, hard disks, USB hub, and video light; the weather station receiver and Digital Loggers remote power switch mounted to the wall; and the electronics stack (power supplies, WLAN, AstroHub, RoboFocus controller, etc.) at right. I know - it's not very pretty (not all rack mounted, etc.) ... but it is functional. |
| Here is another view of the electronics, including (from left to right) the weather station receiver and data logger; the Digital Loggers remote power switch; and the electronics stack. The stack includes a large 12VDC power supply for dew heaters; the AstroHub; the Apple Airport Extreme 802.11n wireless hub (operated as the "remote" in a wireless distribution system, or WDS); the RoboFocus controller and 110V switch (not visible); and power supplies for the Optec TCF-S focuser and Pyxis rotator, the STL camera, and ST camera (which I no longer have), and the Parmount ME. | 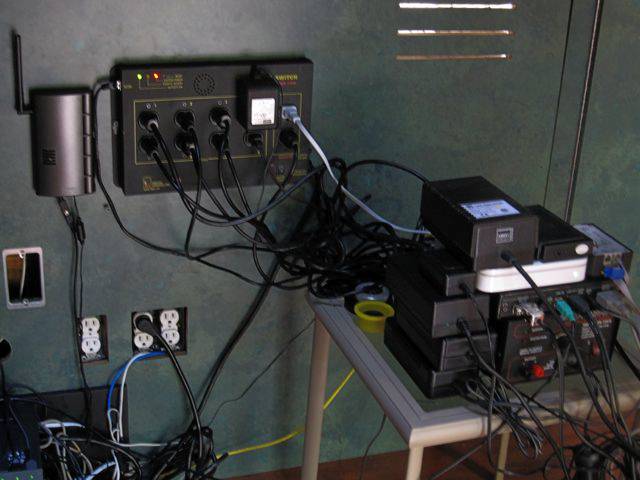 |
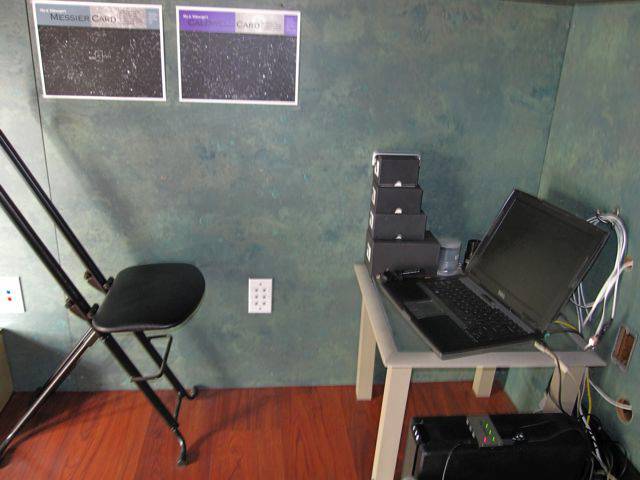 | Here is my "laptop corner", where I can sit and operate the system ... although I almost always operate it from my office in the house. In fact, if I use the laptop, the windows - which regularly are positioned for my 30" display - are scrambled (to fit on the laptop's 14" screen). Therefore, when I'm in the observatory, I generally operate it using my iPhone, which displays the 30" screen of my MacBookPro in the house (which is, in turn, connected to the Dell Astro Laptop with Remote Desktop). You can see a few of my (former) Televue eyepiece boxes to the left of the cmputer, and the UPS and USB hub to the right of the computer. The small switch (with the white cable coiled on the wall behind the computer) can turn the dome clockwise or counterclockwise directly (without requiring computer control). |
As the Sacramento area endures 100-degree (F) heat in the summer, I found that we really needed an air conditioner for the observatory - not for during the day, but to cool it off in time for evening imaging. We purchased this model from Costco, and it has operated well so-far. It is a dual-port model with remote control (but I have not yet 'hacked' it for control over the network). The large hose is actually the input hose, and the exhaust is ported through a large opening in the observatory wall. As can be seen on our Weather page, the observatory runs about 10-degrees (F) higher than ambient in the summer - so it can reach 110-degrees (F). The air conditioner, turned on around 4PM, will cool off the observatory interior to about 80-degrees (F) within about 3 hours, so that it is tolerable by about 7PM (which, in the summer, is still a daylight hour). The main purpose of cooling the observatory is to bring the temperature down to a range where we can cool the CCD camera (via its thermoelectric cooler) down to at least 0-degrees Centigrade, for relatively decent dark current (which decreases with temperature). Usually, by midnight, I can get the camera down to -5C or even -10C. This is in contrast to winter months, where I can achieve at least -25C, and sometimes -30C or lower. |  |
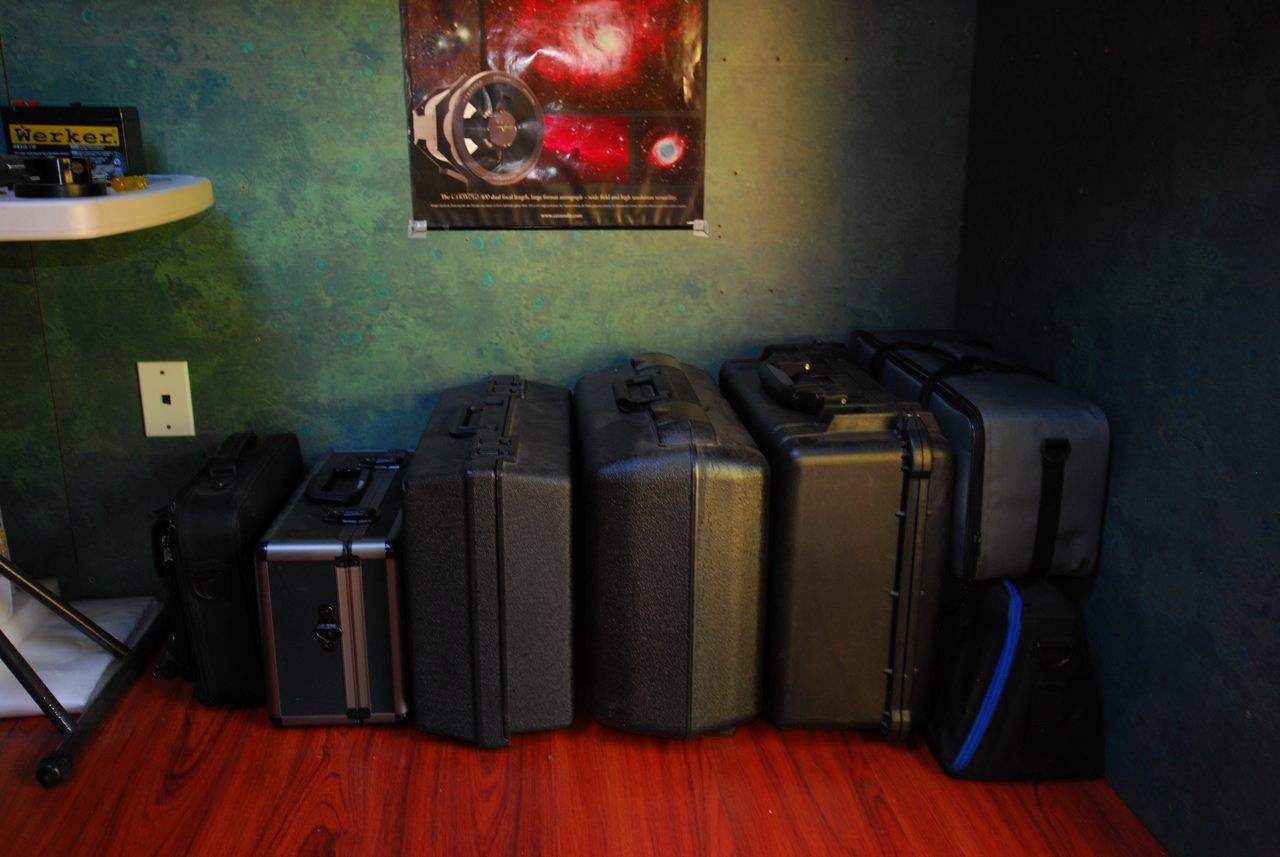 | There is actually quite a bit of room in the observatory - especially in the corners of the 10'x10' building. So in one corner I have stored all of the cases for astronimical equipment, including the FSQ case, a Teleview EP case, the STL case, the LXD-75 case, and a couple of miscellaneous cases. |
I also have a small table for tools that I typically use in the observatory (and an electric hair dryer - just in case of dew). | 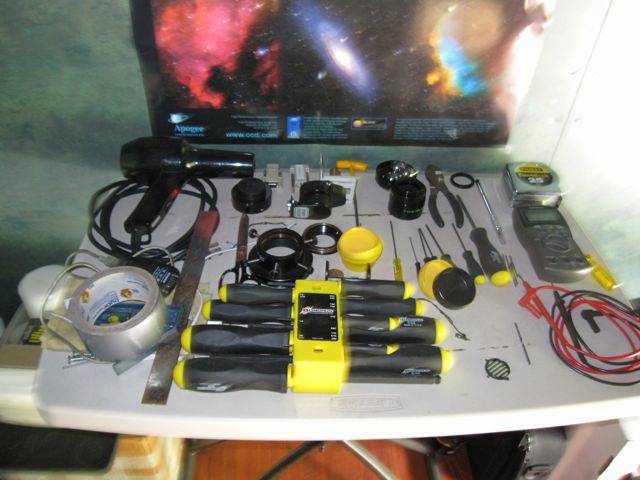 |
 | Another view of the observatory interior. The air conditioning had not yet been installed, but you can see the through-wall exhaust port to the lower right in this image (behind the tool table). |
The observatory - with the slit still closed - as dusk approaches. |  |
 | The Sierra Skies Observatory, ready for imaging, in a moonlit night. The lights of Sacramento are just visible to the right (behind the trees) in this photo. |